Incorporting Webpack into a WordPress theme (part 2)
This is part 2 of of a series of articles on setting up a new or pre-existing WordPress theme to use Webpack. Part 1 can be found here.
Part 2 - Creating Component-specific stylesheets
Components refer to encapsulated code containing its own style and functionality. Many Javascript frameworks including React and Vue make use of this idea. Creating and organising components is somewhat of an art and there is no single way to do so. This is particularly true in a WordPress theme. Some themes are very abstract for a wide variety of use cases while others are custom-built for a single site with a well defined purpose. The latter is probably best suited to Webpack and its chunking capabilities although there is no reason a kitchen-sink-type theme wouldn’t benefit as well.
Before we start creating our Webpack components we are going to separate our theme’s css file into several smaller ones. This will allow us to determine which styles belong to which component so we can minimise dead code in page templates. If you are using _s as a starter theme the style.css file is nicely divided into sections that can be cut up into smaller files. We will use css imports to piece together our stylesheets. Usually css imports aren’t recommended for performance reasons but since this is part of a build process we don’t need to worry about that. The end result will be several smaller files which can be imported into your style.css like so:
  @import '_normalize.css';
  @import '_typography.css';
  @import '_elements.css';
  @import '_forms.css';
  @import '_navigation.css';
  @import '_accessibility.css';
  @import '_alignments.css';
  @import '_clearings.css';
  @import '_widgets.css';
  @import '_content.css';
  @import '_media.css';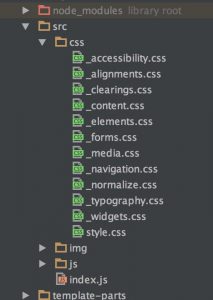
The first stylesheet we will build is main.css. This is the one that will be included on every page. Here is where we may want to have a css reset and our basic element styling. We will now go back to out webpack.config.js file and make some modifications.
We will start first by creating a new entry point changing the way the output files are named.
  entry: {
    main : "./src/index.js",
    output: {
      path: path.resolve(__dirname, "dist"),
      filename: '[name].js'
    }
    ...
  }
Next we will modify our ExtractTextPlugin which is responsible for extracting our css into stylesheets. Here we tell it to name our css files with the same name as our entry and to add the .css suffix to that name.
  plugins: [
    new ExtractTextPlugin({
      filename:  (getPath) => {
        return getPath('css/[name].css').replace('css/js', 'css');
      },
      allChunks: true
    })
  ]
Now we are going to go into our package.json file and modify it slightly so we don’t have to run webpack from the command line every time we make a change. Under scripts we are going to add another npm script.
  "scripts": {
      "test": "test",
      "start": "webpack --watch"
  },
Now from the command line at the root of our theme we can run npm run start or npm start for short. The shortened version only works with npm start. Any other scripts you add need to be called with npm run followed by the name of the script.
After running npm start you should now have a directory named css in your build folder as well as a file named main.css
Creating components
Our components in this example are going to be fairly simple. We will have a home component and an single component for posts and pages.
we will modify the tree structure for our src directory to be something like this
  |____src
  | |____components
  | | |____parts
  | | | |____footer
  | | | | |____footer-scripts.js
  | | | | |____footer-styles.css
  | | | | |____index.js
  | | | |____header
  | | | | |____index.js
  | | | | |____header-scripts.js
  | | | | |____header-styles.css
  | | | | |____navigation.js
  | | |____templates
  | | | |____home
  | | | | |____home-scripts.js
  | | | | |____home-styles.css
  | | | | |____index.js
  | | | |____single
  | | | | |____index.js
  | | | | |____single-scripts.js
  | | | | |____single-styles.js.css
  | |____css
  | | |_____accessibility.css
  | | |_____alignments.css
  | | |_____clearings.css
  | | |_____content.css
  | | |_____elements.css
  | | |_____forms.css
  | | |_____layout.css
  | | |_____media.css
  | | |_____navigation.css
  | | |_____normalize.css
  | | |_____typography.css
  | | |_____widgets.css
  | | |____style.css
  | |____img
  | | |____bg.gif
  | |____index.js
  | |____js
  | | |____customizer.js
  | | |____scripts.js
  | | |____skip-link-focus-fix.js
Our components are divided into parts and templates. The templates can map to classic WordPress templates. Here, I have them referring to front-page.php and single.php. The parts can be thought of as template-parts or php includes.
Chunking
Our first chunk is going to be the home page. To create this chunk we will follow the same procedure as above for creating an entry point
  entry: {
    main : "./src/index",
    home : "./src/components/templates/home/index",
  },
Inside our index.js file in the home directory we will include everything that we need in our homepage. We might start with a list of all the css we need specifically for this page. We can also include our “parts” components. These styles and scripts which are accessed through their individual index.js files will be imported. If we have styles or scripts that pertain directly to our parts components we can include them there so that upon importing the component everything will be available at once. It is important, however, to define parent specific styles in the parent component. This is particularly true for components that are styled differently depending on their placement.
Our index.js in the home component may look something like this:
  /* Styles */
  import '../../../css/_normalize.css';
  import '../../../css/_typography.css';
  import '../../../css/_elements.css';
  import '../../../css/_navigation.css';
  import '../../../css/_accessibility.css';
  import '../../../css/_alignments.css';
  import '../../../css/_clearings.css';
  import '../../../css/_widgets.css';
  import '../../../css/_content.css';
  import '../../../css/_media.css';
  import '../../../css/_layout.css';
  import '../../../css/_global.css';

  import './home-styles.css';

  /* Components */
  import '../../parts/header/index';
  import '../../parts/footer/index';

  /* Global Scripts */
  import '../../../js/scripts.js';
I have taken this opportunity to further whittle down my css files so I have css that is as specific as possible to my home page. have imported my header component and everything in it as well. We will tidy up all of those ../../ paths in a later section.
Inside my header component index.js I have only two imports
  import './navigation';
  import './header-styles.css';
The import './navigation' refers to navigation.js and not navigation.css. Inside my header-styles.css I have styles that are specific to my header and the main navigation menu which in my case resides in the header. I have removed them from navigation.css as they are no longer needed there.
Now when we build our project there will be a file named home.bundle.js. We will also have a file named home.css in the css directory. We can go back to functions.php and enqueue these two files like so:
 function themename_scripts() {
  wp_register_script( 'themename-home', get_template_directory_uri() . '/dist/home.bundle.js', array(), date("H:i:s"), true );
  wp_register_script( 'themename-main', get_template_directory_uri() . '/dist/main.bundle.js', array(), date("H:i:s"), true );

  if(is_front_page()){
    wp_enqueue_style( 'themename-home-style', get_template_directory_uri() . '/dist/css/home.css', array(), date("H:i:s"));
    wp_enqueue_script('themename-home');
  } else {
    wp_enqueue_style( 'themename-style', get_template_directory_uri() . '/dist/css/main.css', array(), date("H:i:s"));
    wp_enqueue_script('themename-main');
  }
}
add_action( 'wp_enqueue_scripts', 'themename_scripts' );
Common chunks
The CommonChunksPlugin for Webpack can be immensely useful when your pages load common code. For example if every page on your site uses jQuery you might want to create a common.js file that is loaded onto each page of your site. The advantage of doing this would be that the common code is cached from page to page. In order to assess whether or not this is useful for your particular site you might want to analyse whether your users typically go from to page of your site or whether they just hit one page (perhaps to read an article) and then leave. If they are going form page to page it might be worth taking advantage of browser cacheing by separating the common chunks.
We need to do is to get a plugin called the CommonChunksPlugin. It is already available to us through the webpack object which we will import.
const webpack = require('webpack');Then we need to add the plugin to the array of plugins
  plugins: [
    new ExtractTextPlugin({
      filename:  (getPath) => getPath('css/[name].css').replace('css/js', 'css'),
      allChunks: true,
    }),
    new webpack.optimize.CommonsChunkPlugin({
      name: 'common'
    }),
  ]
As said we will need to link the common.css and common.js in every page.
In the next section we will get our Webpack ready theme working with Browsersync so that we don’t need to refresh the page after each change we make. Please don’t hesitate to leave comments if anything is unclear or if there is anything specific you would like me to cover in regards to using Webpack with WordPress.
Continue to Part 3